Download and Installation

  1. Download Sublime Tex 3 for your operating system.
  2. Install
    • Window/Mac: GUI install, just doubly check the file you downloaded, and follow the instructions.
    • Ubuntu: here assume you have downloaded the deb installation file, open a terminal and type in the following command sudo dpkg -i path/to/sublime_text_3_deb_file

Configuration

  • Manually (Semi-manually) install Package Control (Note that, Package Control is the only package that you need install manually)

ctrl + ` (command + ` if you use Mac) to open the console, and copy the following codes into the console and then press enter.

import urllib.request,os,hashlib; h = 'df21e130d211cfc94d9b0905775a7c0f' + '1e3d39e33b79698005270310898eea76'; pf = 'Package Control.sublime-package'; ipp = sublime.installed_packages_path(); urllib.request.install_opener( urllib.request.build_opener( urllib.request.ProxyHandler()) ); by = urllib.request.urlopen( 'http://packagecontrol.io/' + pf.replace(' ', '%20')).read(); dh = hashlib.sha256(by).hexdigest(); print('Error validating download (got %s instead of %s), please try manual install' % (dh, h)) if dh != h else open(os.path.join( ipp, pf), 'wb' ).write(by)
  • Install package LatexTools
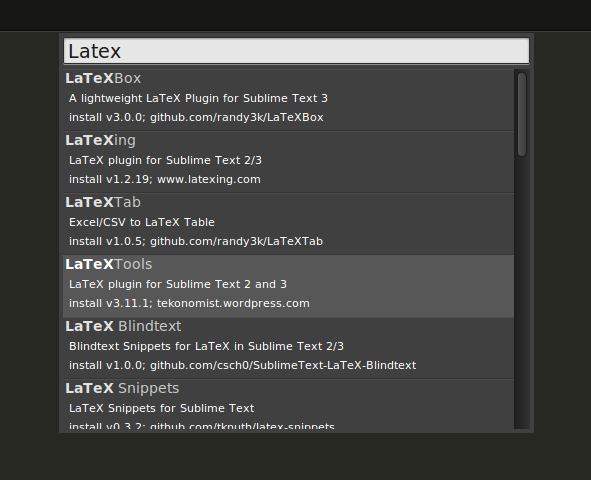
    • ctrl + shift + p (command + shift + p if you use Mac) to open the command Platte for Package Control
    • Find and click “Package Control: Install Package”
    • Enter “LaTexTools” to search and click on the “LaTexTools” to install
  • Configuration

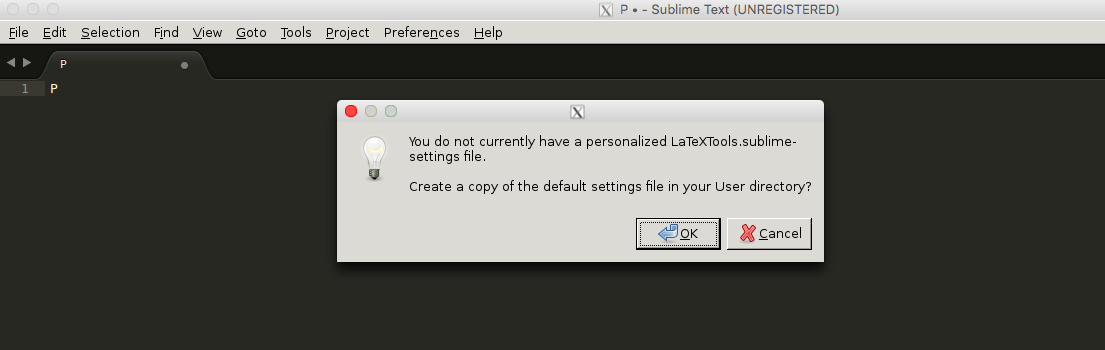
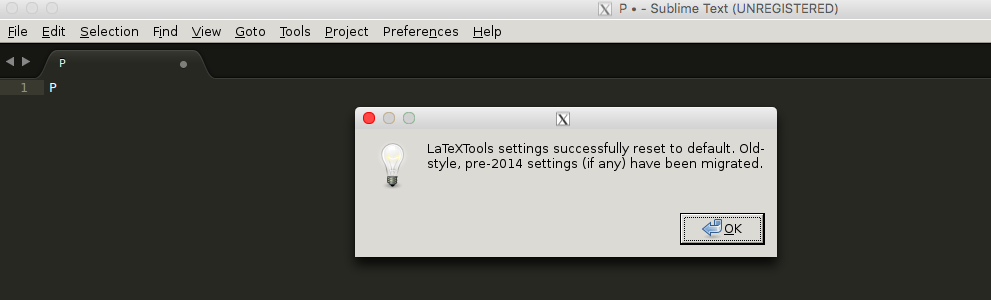
    • Open the configuration for LaTeXTools and “OK” for all pop-up windows.
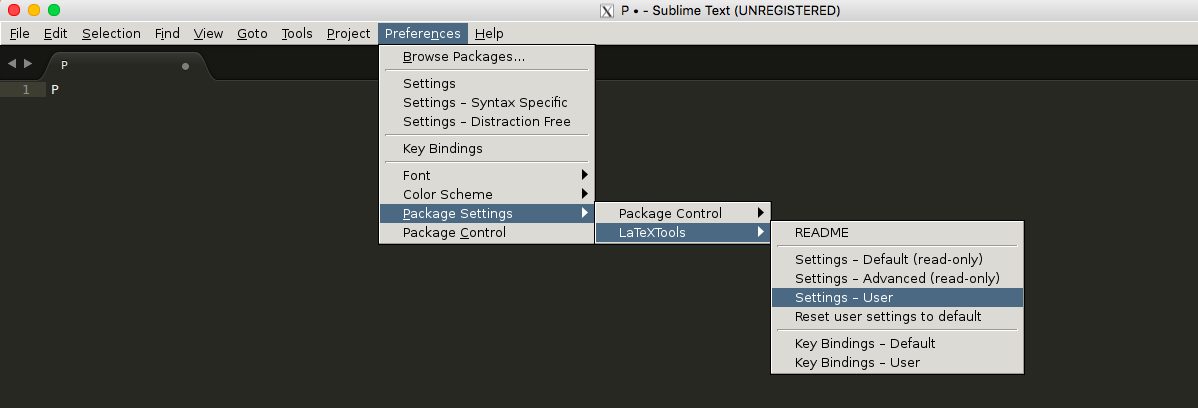
    • Replace the content with this one

To use the above customized configuration, you need the following tools (note that, for the latest version of Ubuntu, all tools are built-in in the OS.)

Enable the Required Modules

sudo a2enmod proxy
sudo a2enmod proxy_http
sudo a2enmod rewrite

Configuration

Before you change the configuration file, you are suggested to make of backup of the original configuration. ~~~shell sudo cp /etc/apache2/sites-available/000-default.conf /etc/apache2/sites-available/000-default.conf.bk sudo vi /etc/apache2/sites-available/000-default.conf ~~~

<VirtualHost *:*>
        ProxyPreserveHost On
        ProxyPass "/db" "http://localhost:8080"
        ProxyPassReverse "/db" "http://localhost:8080"
        ProxyPass "/chart" "http://localhost"
        ProxyPassReverse "/chart" "http://localhost"
    ProxyPass /static/  http://localhost:8080/static/
    ProxyPassReverse /static/ http://localhost:8080/static/
</VirtualHost>

Explanation

Assume the your server is exmaple.com, by using the above configuration, the server will act as a proxy for http://localhost:8080/db/.* when seeing the URL http://exmaple.com/db/.*

Given functions , for any fixed define the maximum function as , and set , we have if exists at , then .

proof: [General idea: ]

  • :

Since , for any , and ,

  • :

You can add the following lines at the beginning of your Python source codes to specify the encoding.

#!/usr/bin/python
# -*- coding: <encoding name> -*-

For example, you want to encode your source code in ASCII codes, you can add the following two lines at the beginning of your python source codes.

#!/usr/bin/python
# -*- coding: ascii -*-

More details you can refer to documentation of Python official site.

In this post, we will introduce a method to help you easily do cross reference in a multi-file latex project (i.e., a latex project where latex source files are distributed into multiple files). For example, the file structure of a multi-file latex project might look like:

path/to/your-latex-project/
    main.tex 
    introduction.tex
    related-work.tex
    my-work.tex
    evaluation.tex
    conclusion.tex
    reference.bib
    figures/

In the above project, you might cross cite for example an algorithm which you define in the file my-work.tex in the file evaluation.tex. Without the assistance of some useful tools, you might have to check the file my-work.tex to make sure which label you have defined for that algorithm. And in some tools, they might automatically remind you all the labels you have defined in the current file, which means they cannot help you in the cross-file cross reference.

In this post, we will describe you an easy method to help you do the cross-file cross reference by using the LaTex Tools plug-in of Sublime Text. Note that in this post, we will focus on the configuration for cross-file cross reference. If you have no idea on how to install the LaTex Tools or even Sublime Text, please ask Google or some other search engine.

Step 1 Create a Sublime Text Project
Create a sublime text project for your multi-file latex project. If you have no idea on how to create a project in sublime text 2/3, please refer to understanding-projects-in-sublime-text-saving-switching-etc.
Step 2 Configure Your Project
After you create your project, you will see a auto-created file (named as your-project-name.sublime-project) in your root path of your multi-file latex project. Open the file, and the put the following configurations into the file.
"settings" : {
    "TEXroot": "main.tex",
    "tex_file_exts": [".tex"],
    "builder_settings": {
        "program": "latex",
        "options": "--shell-escape"
                        }
             }

The above configuration assumes, the root latex file of your project is main.tex (if your project use another tex file, please change it correspondingly.). If you really want to make a full understanding of the above configurations, please refer to Project-Specific Settings of the Latex Tools.

The following is for those who are not so familiar with JSON, i.e., the format for the project setting file. Usually, before you do manual changes on the project setting file, its content looks as follows:

{
    "folders":
    [
        {
            "path": "."
        }
    ]
}

After you add the configurations, your setting file would look as follows (please pay attention to the comma after the ], it cannot be omitted):

{
    "folders":
    [
        {
            "path": "."
        }
    ],
    "settings" : {
        "TEXroot": "main.tex",
        "tex_file_exts": [".tex"],
        "builder_settings": {
            "program": "latex",
            "options": "--shell-escape"
        }
    }
}

Notice

If you have any suggestions or questions regarding this post, please lease your message in the comment session or send e-mail to mr.gonglong@outlook.com directly.